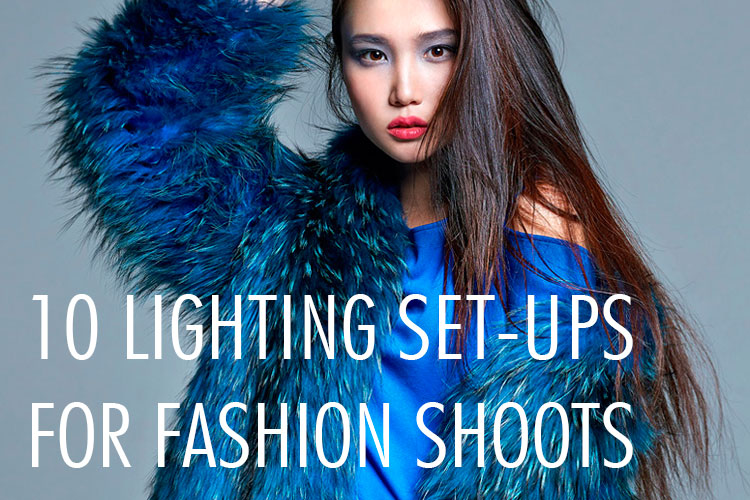
Ten lighting setups which you will merely create with a standard set consisting of three Hensel lighting fashions by Dmitry Mukhin / initially printed on fototips.ru
“Many aspiring photographers ask the question how one can organize lighting gear when capturing a portrait in studio. Determining that it’s very onerous to review with out having any examples, we decided to jot down down an article about pattern pictures.”
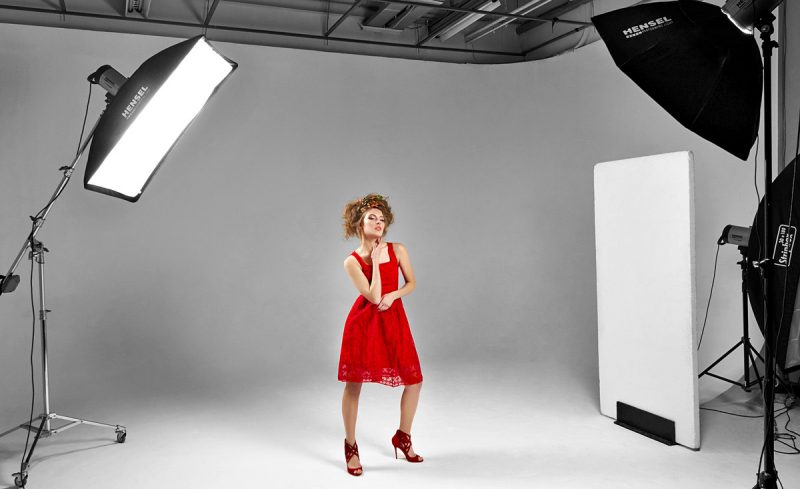
LIGHTING EQUIPMENT USED
“To make the setups easy to repeat in most studios, we used three Hensel Integra 500 monolights. Along with essentially the most well-liked light modifiers: 90 cm Octabox, 120 cm silver umbrella, Magnificence Dish, regular reflectors, Stripboxes in 60 х 120 cm and 30 х 180 cm (ideally these must be the an identical, nonetheless we would have liked to work with what was obtainable). Beside these we used reflective panels and black flags.”
Setup 1


“Because the precept light we used the lighting unit with a silver umbrella, set a bit to the left from the digicam. We set two lighting fashions equipped with stripboxes on both aspect and a bit behind the model.
To stay away from the have an effect on of stray lights on the background we put white panels between the background and the lighting fashions. The panels maintain undesirable light from the background and redirect it onto the model. This moreover offers further amount to the once more light. The background itself was illuminated by the precept light solely.
The background lighting depth on this setup can merely be managed by the place of the precept light. Once you improve the sunshine with the umbrella elevated and tilt it proper all the way down to the model further sharply, the precept light falls onto the model, and the background is solely hit by the sunshine coming from the upper peripheral part of the umbrella, so the background, on this case, turns into darker.
If we put our important light to a lower place and swap it to a further frontal path, then a comparatively massive amount of sunshine coming from the precept lighting unit will fall on the background making it lighter, nonetheless an undesirable shadow coming from the model may appear on the background.”
A draft of the setup (click on on to enlarge):

Setup 2


“Vivid, saturated colors of the model’s clothes are wanting good in entrance of a totally white background. When lighting a background to the utmost, there could also be on a regular basis the hazard that the sunshine mirrored from the background shall be so extremely efficient that it should fill your entire scene. To stay away from these stray lights, it is a should to determine the exact light publicity. To chop again the amount of stray light from the background to a minimal, we used regular reflectors we used regular reflectors. Furthermore, we put in white panels between the monolights and the model.
Due to this, the aspect light from the background lighting fashions goes on to the background, with out touching the model. Every the direct light and the reflection from the underside of the panels turned the background completely white with none shadow coming from the model. The doorway of the white panels functioned as fill lights, reflecting the sunshine coming from the precept lighting unit.
The last word picture choices good distinction and every aspect of the clothes is clearly seen.”
A draft of the setup (click on on to enlarge):

Setup 3


“This is usually a fairly easy setup. As our important light we used the monolight with an octabox.
We made full-length footage of the model, so we used a 30 х 180 cm stripbox which was set on the left aspect of the model. This kind of stripbox is sweet for full measurement footage. In the end, we acquired a brightly illuminated model standing out clearly in direction of the darkish grey background.”
A draft of the setup (click on on to enlarge):

Setup 4


“Now it’s time for a setup with a single light provide. The first light comes from the monolight equipped with our favorite software program – the octabox! At both aspect of the model, we used two large reflecting panels to fill the sides up with light.
It turned out to be merely ample to get an attention-grabbing picture. As you might even see proper right here, the background is illuminated evenly.
Why have I generally known as the octabox a favorite software program? That’s on account of I’ve on a regular basis favored it for its comparatively tender (nearly umbrella-like) nonetheless merely controllable light. And we don’t get a sq. shaped eyecatch that we get from a conventional rectangular or sq. softbox, nonetheless a spherical, pure wanting reflection.”
Draft of the setup (click on on to enlarge):


Setup 5


“On this setup, the precept light is coming from an octabox. We used a stripbox as backlight and separated it from the background with a reflector panel to efficently decrease stray light on the background.
To create the gradient on the background, we used a monolight equipped with a 12″ reflector and grid. The sunshine spot on the grey background makes the picture further vivid.
In the event you want to be further creative and use coloration gels set on the background lighting unit, it may add a model new affect to the image and swap the tender grey background to a colored one. The dimensions of the spot can merely be adjusted with help of grids that features completely totally different diploma values.”
Draft of the setup (click on on to enlarge):

Setup 6


“For one in every of many earlier pictures (setup 4) we created darkish grey background.
By together with a background light with a standard reflector and grid to the setup, we illuminated the background and adjusted the mood of the image straight away. This occasion reveals higher of all the best way wherein how any setup is perhaps modified and supplemented to realize the outlined function.”
Draft of the setup (clickt to enlarge):


Setup 7


“The entire-length shot with a fairly tall model required illumination from the very best to the underside of the physique. It’s easy to get it in case you employ the monolight with a protracted stripbox because the precept light.
For the once more light we moreover used a stripbox. To both aspect of the model we put in black light absorbing panels, so that the sunshine from the monolights acquired’t be mirrored uncontrollably once more on the model.”
Draft of the setup (click on on to enlarge):

Setup 8


“The next one: For the precept light proper right here, we used the lighting unit with an octabox.
The once more light provide with a stripbox was positioned behind the model on the left and extreme ample to mild up the hair, too.
To create a fill light on this picture, we added a reflector panel to the exact of the model.
The setup like this allowed us to get an excellent and even background illumination and to stipulate the model with a once more light on the same time.”
Draft of the setup (click on on to enlarge):

Setup 9


“An umbrella is comparatively not typically used inside the studio, whereas on location it’s slightly in type as a consequence of its compact dimension and rapid readiness to work.
For the precept light we used the sunshine provide with a silver umbrella and an umbrella flood reflector which supply collectively a reasonably tender nonetheless nonetheless wise wrap-around light.
The sunshine is spreading from the availability in a gentle lightwave, illuminating nearly each half on its means. In our case we used an unlimited parabolic umbrella that gave us a lightweight beam which we nonetheless might administration by shifting the umbrella axis. Nearer to the reflector ends in harder light, shifting it extra away from the reflector ends in softer light.
The umbrella was positioned almost above the photographer’s head, a bit to the exact and directed sharply downwards.”
Draft of the setup (click on on to enlarge):

Setup 10


“For our important light proper right here, we used a Magnificence Dish. To get a further directed light beam inside the heart, we moreover related a metallic grid.
At both aspect of the model we positioned light absorbing panels (so generally known as French Flags). The model carrying a black leather-based jacket, was illuminated with a slim beam of sunshine so that the background appears to be completely black.
Inside the second picture, we illuminated the background with a 9″ reflector as a lightweight modifier to separate the jacket from the background,”
Draft of the setup (click on on to enlarge):

Conclusion
“Drawing a conclusion to this overview, I wish to say that good footage is perhaps taken with one or moreover with two light sources which may be blended in keeping with your creativeness. Using three light sources at your shoot makes your prospects limitless. That’s the reason why many lighting companies, along with Hensel, present kits along with three lighting fashions and lightweight modifiers packed in a useful branded case.”
Watch the behind the scenes video of this shoot proper right here:
Credit score
We thank hensel-studio.ru, distinctive distributor of Hensel in Russia, for technical help inside the organizing of this capturing.
Workforce Photographer and styling: Ira Bachinskaya, @irabachinskaya_photographer Author and technical specialist: Dmitry Mukhin Make-up: @VASILISA (Елена Васильева) Fashions: Yulia Khan, Sima Rybakova, Yulia Kozhukhova, Violetta Orlova.
Supported by